Pages

Showing posts with label sewing. Show all posts

Tuesday, October 15, 2013

Black Apple Dolls

I first became familiar with Black Apple Dolls almost 5 years ago when my sister in law made some for her daughter, Lola. Then I started noticing them all over around that time but forgot about them a little later. It wasn't til I found out I was pregnant with twin girls that I remembered them. I am putting a little shelf in the twins room and I wanted some kind of doll or stuffed animal to put on it. I remembered the Black Apple Dolls and decided to make a couple.


I think they first appeared on Martha Stewart, here the link for the pattern and instructions. Here is the website of the girl who created the doll. I had seen some really cute ones on Pinterest and knew I wanted to add a little extra detail to these.


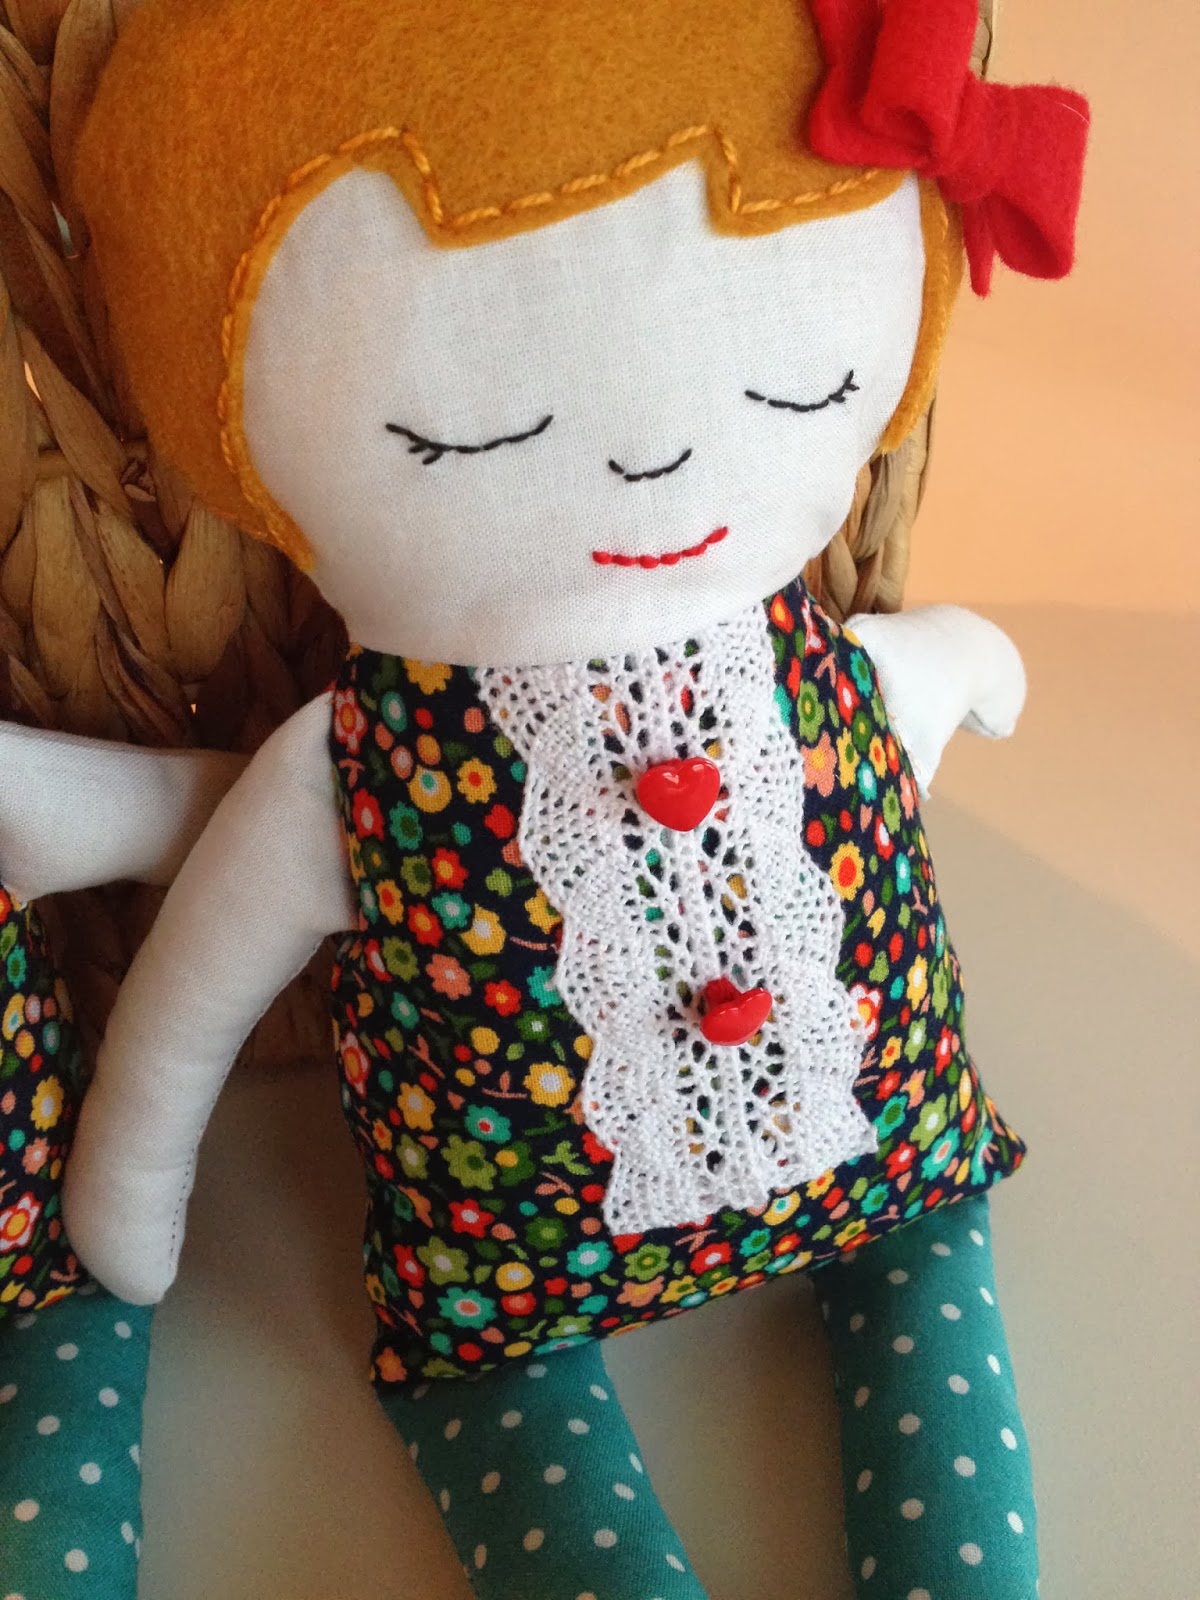
Since they are twins, the only thing I changed was the direction of the hair. I was going to do opposite clothes but I ended up loving the floral for the top and the polka dots on the legs so much that I kept them both the same. I added a little lace to the front with some cute little heart buttons.

Since I have brown hair and my husband has blonde hair I went for a color of felt that was kinda in between. It's a pretty goldish color and I love it.


I decided to stitch their eyes in the "closed" position. I thought it would be less creepy than having a doll up on a shelf staring at you!


I saw some dolls on Pinterest that had little Mary Janes on, I kinda winged it but I think they turned out pretty cute! Who doesn't love red shoes?!


I've also been obsessed with felt bows the last little while so I made a couple for the dolls.


One more item checked off the list for the twins room...still a long way to go!

Wednesday, September 11, 2013

baby burp cloths

I saw these on Pinterest the other day and instantly thought that I had to make some. I got the fabric and went to work. I made 4 of them in about an hour. Be sure to wash your fabric before hand since these will be washed several times once they are actually used.


There's a great tutorial and free pattern found here

Wednesday, January 30, 2013

Valentine heart oven mitt pattern


This heart oven mitt is so cute! The little half hearts are perfect to slip your hands in and grab anything hot. This would make an adorable Valentine's gift with a bag of chocolate chips or any baking supply.

Materials needed:
-2 fat quarters (or scraps, the heart isn't too large)
-batting, Insul-Bright is best and can be found at any sewing store
-trim (if desired, pom pom trim is adorable on these!)
-sewing supplies


Steps:

1. Cut:
    2 large hearts on the fold of fabric
    1 large heart on the fold of batting (I used Insul-Bright because it's heat resistant) 
    2 small heart halves
    3 strips of fabric or bias tape pieces about 10 inches long

2. Attach bias tape & trim to straight edge of the heart halves

3. If using a strip of fabric make a loop for hanging by folding fabric in half twice and stitching along edge length wise

4. Make a sandwich in this order:
    batting
    front large heart face up (green heart in picture)
    half hearts placed like they are shown in the finished mitt face up
    loop for hanging (fold in half and pin near top of heart)
    back large heart face down

5. Sew around edge and leave a gap open for turning

6. Turn right side out through gap

7. Hand stitch closed

Happy Valentine's Day!!

Monday, November 5, 2012

french door curtains

In our new home we have a set of french doors in our front room and a single door with glass that goes to our porch. I love the look of french doors with curtains so I plan on making these as soon as we move in. I found a couple good tutorials on how to make them. 


All you need is some fabric and one of these curtain rods, it's temporarily out of stock but you could probably find one at a local sewing store, Lowe's or Home Depot.

It's called a sash rod

here is the fabric I'm looking at from fabric.com


I also like these ones, they are a bit lighter and may let in more light since they aren't the heavier home decor weight

I think I'd hang this one vertical rather than horizontal

Any preference?

Tuesday, October 23, 2012

pinterest project success-heart sweater

I originally saw this project over on Pinterest and instantly thought of an old sweater I had that would be perfect for the project.

So I followed the instructions on this super cute blog and was very happy with how it turned out.


print pattern
pin on shirt
sew on X's
tear off paper
done!

The one thing I didn't do that she suggested was to spray the paper with water to soften it before tearing it off. If I had actually read that I totally would have done that! My X's were perfect but with tearing they got a little loose. Be sure to dampen your paper before tearing!!!


Come follow me on Pinterest!

Thursday, August 23, 2012

bapron's

I have 2 friends having babies within the next 3 weeks and I made each of them a little something. I love how they turned out...but I had to give them away so please excuse the bad pictures that I snapped right before I gave them both away.

I used a tutorial from one of my favorite blogs- Craftiness is Not Optional. You should check out her blog, it's pretty awesome and she is so sweet. She has a ton of amazing tutorials too.

These are called bapron's...a baby apron. And they look so adorable on a baby!


Wednesday, August 15, 2012

re-useable snack bags

I saw something similar to these on a blog a few days ago and knew I could make them. 
These re-usable snack bags are great for dry snacks but also work for food like grapes. The fabric for these is super cheap. I bought 1/3 yard at Joann and it cost $.60. Pretty cheap huh?
One thing I love about these is that they don't use velcro, they are easy to wipe clean 
and super easy to make. Here's a little tutorial so you can make them on your own.


Items needed:
1/3 yard utility fabric (see picture below)
sewing necessities (machine, thread, etc.)


This is utility fabric, it's the same thing all the re-usable grocery bags are made out of. It's about $2.99 per yard, the only bummer with this is that stores tend to not have many options with prints/patterns.


Cut strips of fabric 12"x6", your fabric should already be 12" wide if you bought 1/3 yard.


 Zigzag stitch or serge the bottom side


 This picture is a little confusing, I folded the top half down 5 inches and turned it over so the pattern faced up on the front side. 
You can play around with it depending on which direction your pattern faces.


 Fold the other part over the front so they over lap an inch or 2 and pin closed.


 Zigzag stitch or serge down both sides
And you're done!
Very easy right? I went back and double stitched the sides just to re-enforce the stitching. If you serged it there is no need to double stitch.

If you aren't familiar with the baggies that fold over themselves like these, here are 2 pictures of what they look like folded open.

Fill it up and fold it closed again!
Enjoy!


Wednesday, August 8, 2012

tutorial is coming soon

I have had this fabric for awhile and wanted to use it on something, but I just couldn't decide what.


I finally figured out what I wanted to make and here's a glimpse of the final product.


I've had a few people ask for a tutorial...
I'm working on one and will hopefully have it up next week sometime.
Have a great day!

Wednesday, December 14, 2011

oh boy

I just found out 2 minutes ago that I made it in the top 12 of a sewing competition...so overwhelming and exciting. I can't believe I was chosen out of 127 people, goodness. The first week of competition I have to sew something "for the home"...please leave a comment with suggestions I need your help!!


Monday, November 14, 2011

guest post: Shannon Sews


Hey everyone, please give a warm welcome to my guest blogger today...Shannon Sews!!

 Greetings from ShannonSews!
I’m so excited to be able to do a guest post on Dresden’s blog. She’s so cute and full of talent. I love making new blogging friends who enjoy creating and sewing like I do.

Okay, a little about me.
My name is Shannon (probably already knew that). I'm a Seattle native and love my life here with my sweet husband, and neary-by family. The city is beautiful, the air is fresh and the scenery is green.

It seems that you kind of fall into what you love (that's been the case with me anyway) and about a year ago I stumbled upon a hidden passion of mine. Sewing. I love the challenge of a good clothing refashion, the inspiration of design, the freedom of creativity and the sweet satisfaction of my designs coming to life.

Before long, sewing became much more than a hobby for me. I started consigning and opened an etsy shop: Shannon Sorensen Designs. A place I could share my heart-felt work.

I have so many things I want to add to my shop. My mind often swirls with new ideas and designs. I currently have a crush on pillows

and designing baby bibs and burp cloth sets. Babies deserve a little glam too. 

We'll see where else the wind takes me.

In my non-sewing time, I help manage an after-school program. I just love those kids. Contributing to their lives every day is very fulfilling. I wouldn't feel complete without it.

Outside of my "shop" projects and school job, I love to sew clothing and do refashions. A couple of my favorite clothing projects would probably have to be this ruffled shirt:


Other favorites would have to be this set of sheer overlay skirts:


*And, not to leave you without a few how-to's, below you'll find a few links my readers found helpful. Hope you do too.
I love to meet new bloggers! Stop by ShannonSews and say hi. Any friend of Dresden's, is a friend of mine!

Tuesday, November 8, 2011

one rockin' blanket

I have a new nephew!! Ridge was born yesterday, 11/7, to my sister in law Brandi and her husband Roudy. I cannot wait to hold the new little guy! I made him this blanket last week and thought I'd share it with you!

 I cut out a giant guitar with my Silhouette in vinyl and then
stuck it on the fabric and traced it.
I cut out the letters with my Silhouette also, only I used fabric interfacing
with them since they were small enough to fit on a cutting mat.

 Isn't the fabric on the back so cute?! And the giant ric-rac, who doesn't love giant ric-rac?

I added the star as an accent for fun!

Wednesday, November 2, 2011

so you think you can sew?

I am participating in a contest over at Mommy By Day...Crafter By Night and I really hope I get chosen for the competition. If I get chosen I'll be in a sewing competition that is 4 weeks long in January. If you are interested in participating click here, they are accepting projects until November 30.


I am entering this skirt to hopefully qualify me for the competition!


I may be enlisting you readers to vote for my projects...if I get chosen. Wish me luck!!

Monday, October 31, 2011

love bird wall art

I made this bird wall art a while ago for a tutorial on Tatertots & Jello, but I don't think I ever showed it on my blog. So here is a little tutorial on how to make a Love Bird Wall Hanging using the Silhouette and a sewing machine.


I made this out of some scraps of fabric and an old frame I had laying around (actually a wedding gift that I wasn’t too fond of :) )! The inspiration for this piece came from a pillow found here and a card found here.


First I took this frame and painted it a nice white color so 
it would stand out against the fabric I chose.


Next I cut out all these little birds using the Silhouette with the 
fabric Interfacing on my fabric.


Then I arranged the birds on my piece of fabric, which actually didn’t 
take too long after I got out my giant ruler.


You want to know my favorite thing about the fabric interfacing from Silhouette? It is double sided, so once I had the birds in place I simply ironed them on and they stayed in place the whole time I was sewing them on. You could of course use the no-sew interfacing, but I prefer the sewable because I love the stitched look.

I chose a tiny zig-zag stitch in pink to give them a little more character. After sewing it you could either wash the entire piece or do what I did…use my fingernails to fray the edges.
Once they were sewn on I put it in the frame and there ya go!


Have a fabulous day!

Don't forget the GIVEAWAY ends TONIGHT! 
Winner announced tomorrow!