Hello everyone! I hope you had a wonderful Mother's Day.
I've got a fun tutorial for you today!
I've got a fun tutorial for you today!
here's what you need:
t-shirt (I used a $3.50 one from Forever21)
scraps of fabric
fabric interfacing (a must when using the Silhouette and highly recommended but not necessary if you are doing this by hand)
sewing machine
coordinating thread
Step 1: iron your scraps of fabric and iron the interfacing to the back (following instructions on pkg)
Step 2: cut out your houndstooth pieces, I did mine about 2.5" x 2.5". You could easily do this by hand by just tracing a houndstooth or any other shape you want.
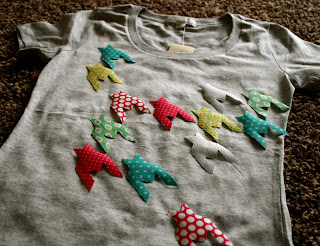
Step 3: lay our your pieces on your shirt, I did mine kind of scattered to add interest.
Step 4: iron the pieces down, this is the best part of the Silhouette Fabric Interfacing. It's double sided so you can iron it and it will stick down.
Step 5: sew each piece on, I forgot to get a picture, but it's pretty easy. Just be sure to only sew through one side of the shirt! And be gentle with the t-shirt since it's a knit fabric you will have to be more cautious when sewing on it.
Step 6: You're done! Didn't it turn out so cute?! I washed mine after this step to make the edges of the pieces a little distressed.
This project only cost me $3.50, I already had scraps of fabric from other projects and I had the fabric interfacing from this project. It's fun to come up with your own t-shirt designs, I look at shirts in the mall and all over the internet to get ideas...then I make them for a lot less $$! I hope this inspires you to do the same.
Linking up to Tatertots & Jello Weekend Wrap Up
Linking up to Tatertots & Jello Weekend Wrap Up


